Create IAM Role for EC2 instance profile

Mohamad's interest is in Programming (Mobile, Web, Database and Machine Learning). He is studying at the Center For Artificial Intelligence Technology (CAIT), Universiti Kebangsaan Malaysia (UKM).
Problem:
During the creation of AWS Beanstalk, at step no.9 i.e. select EC2 instance profile dropdown list, the EC2 instance profile dropdown list doesn't list any values to choose from.
Solution:
Complete the steps below i.e." Create IAM Role for EC2 instance profile" to create an IAM Role that you can subsequently select for the EC2 instance profile.
Steps:
To create a an IAM Role for EC2 instance profile selection
Choose View permission details. This displays under the EC2 instance profile dropdown list.
A modal window titled View instance profile permissions displays. This window lists the managed profiles that you'll need to attach to the new EC2 instance profile that you create. It also provides a link to launch the IAM console.
Choose the IAM console link displayed at the top of the window.
In the IAM console navigation pane, choose Roles.
Choose Create role.
Under Trusted entity type, choose AWS service.
Under Use case, choose EC2.
Choose Next.
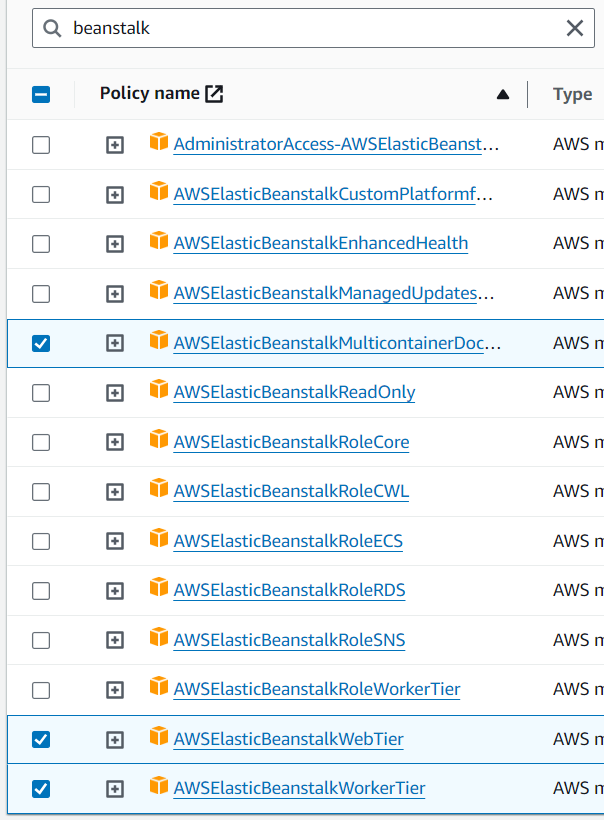
Attach the appropriate managed policies. Scroll in the View instance profile permissions modal window to see the managed policies. The policies are also listed here:
AWSElasticBeanstalkWebTierAWSElasticBeanstalkWorkerTierAWSElasticBeanstalkMulticontainerDocker
Choose Next.
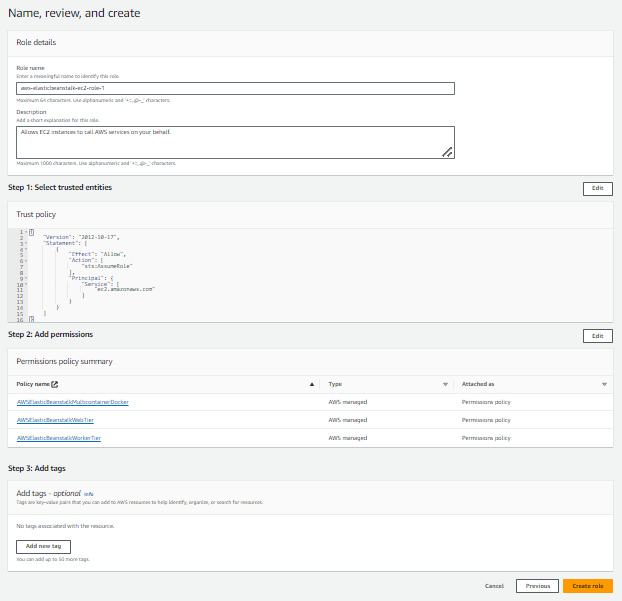
Enter a name for the role. e.g.
aws-elasticbeanstalk-ec2-role-1(Optional) Add tags to the role.
Choose Create role.
Return to the Elastic Beanstalk console window that is open.
Close the modal window View instance profile permissions.
Important
Do not close the browser page that displays the Elastic Beanstalk console.
Choose (refresh), next to the EC2 instance profile dropdown list.
This refreshes the dropdown list, so that the Role you just created will display in the dropdown list.
https://docs.aws.amazon.com/elasticbeanstalk/latest/dg/GettingStarted.CreateApp.html